
Appearance
Configuring MySQL Data Source
This guide explains how to configure a MySQL data source in Datafor to ensure proper data connectivity and access.
1. Access the Data Source Configuration Interface
In the Datafor platform, navigate to Data Source Management.
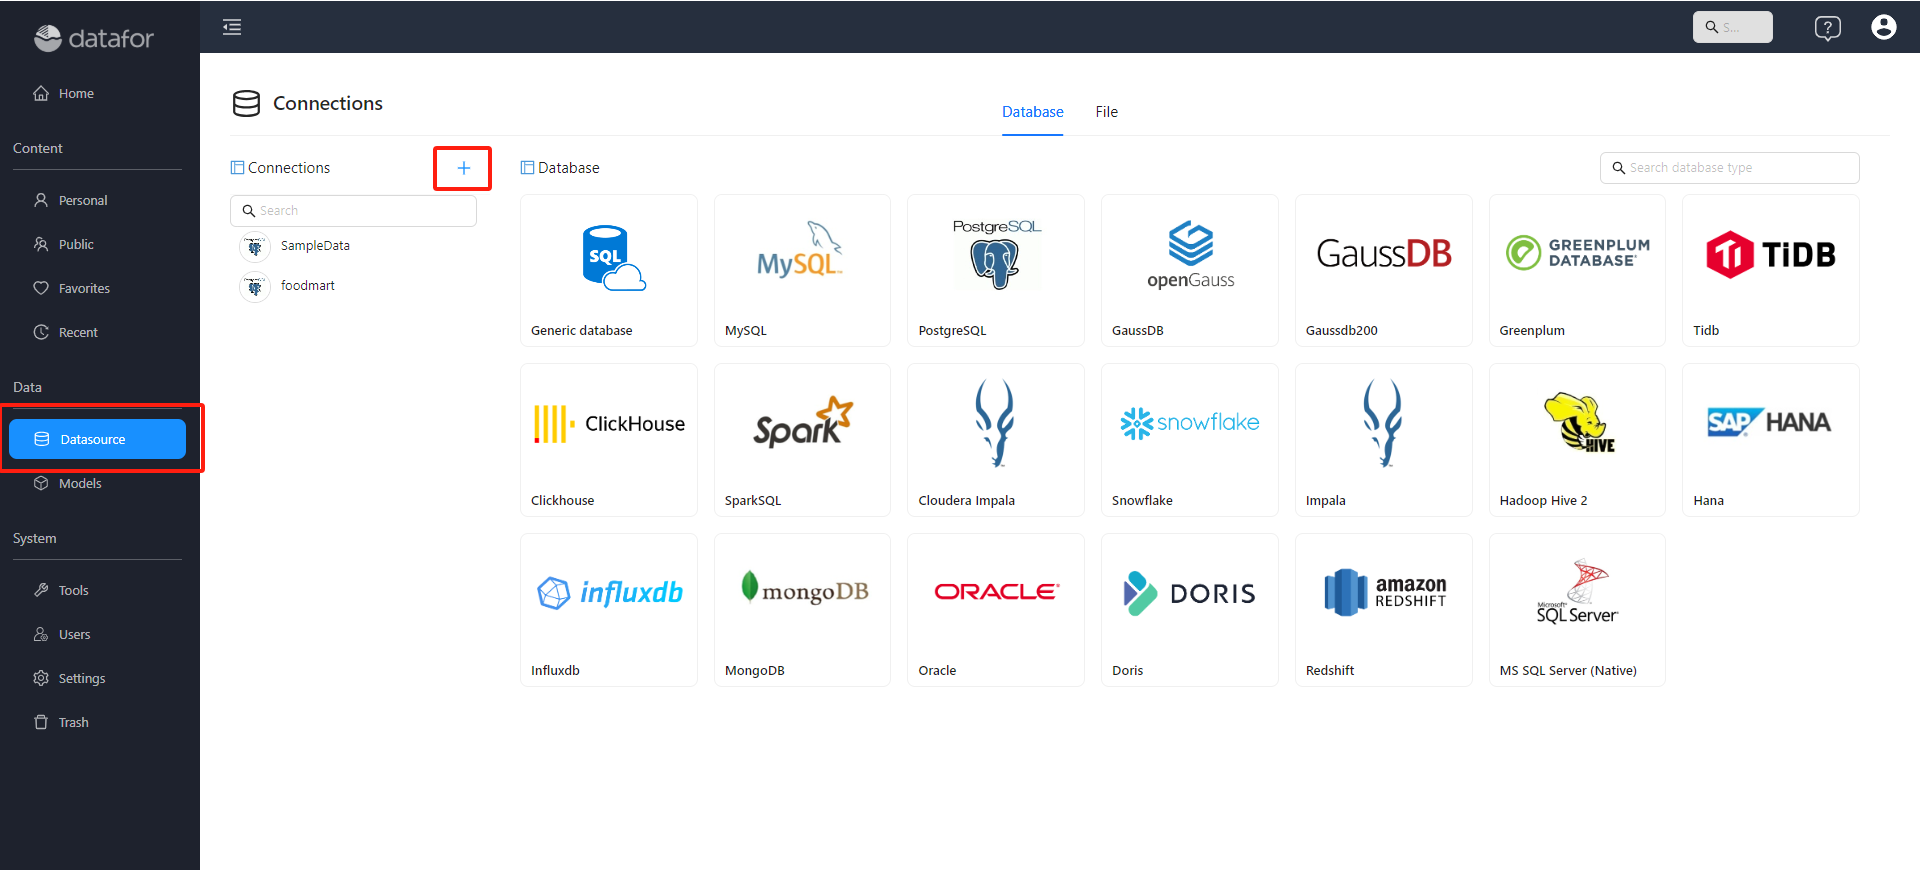
Click on MySQL to enter the JDBC connection configuration interface.
2. Basic Configuration
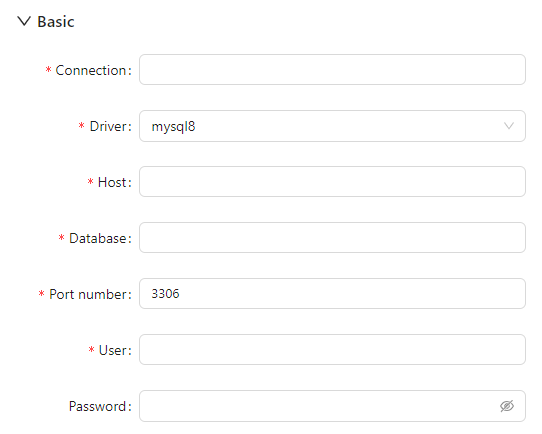
In the Basic configuration section, fill in the following details:
- Connection (Connection Name)
- Assign a custom name for this data source to facilitate identification in future usage.
- Driver
- Select
mysql8(for MySQL 8 and above). - If the required driver is not listed or needs updating, refer to the [JDBC Driver Management] documentation to ensure the correct driver files are loaded in Datafor.
- Select
- Host (Server Address)
- Enter the MySQL server address, such as
127.0.0.1or a remote server IP.
- Enter the MySQL server address, such as
- Database
- Enter the name of the MySQL database to connect to.
- Port number
- Default is
3306. Modify if a different port is used by the server.
- Default is
- User
- Enter the MySQL username with access to the database.
- Password
- Enter the corresponding password for the MySQL username.
3. Advanced Configuration (Optional)
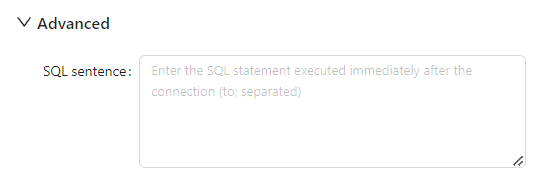
In the Advanced section, you can enter one or more SQL statements (separated by ;). These statements will execute immediately after the connection is established. They can be used for session-level variable settings or initialization operations, such as:
SET NAMES utf8;
SET SESSION sql_mode='STRICT_TRANS_TABLES';
4. Connection Options
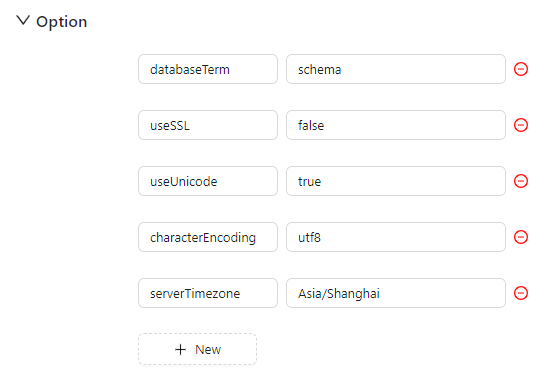
The Option section allows setting additional JDBC parameters to meet different connection requirements:
- databaseTerm: Defines the database term, default is
schema. - useSSL: Whether to use SSL for the connection, default is
false(disabled). - useUnicode: Whether to enable Unicode support, default is
true. - characterEncoding: Character encoding, default is
utf8. - serverTimezone: Server timezone, e.g.,
Australia/Melbourne, adjustable as needed.
To add more custom parameters, click “+ New” to define new key-value pairs.
5. Connection Pooling Configuration
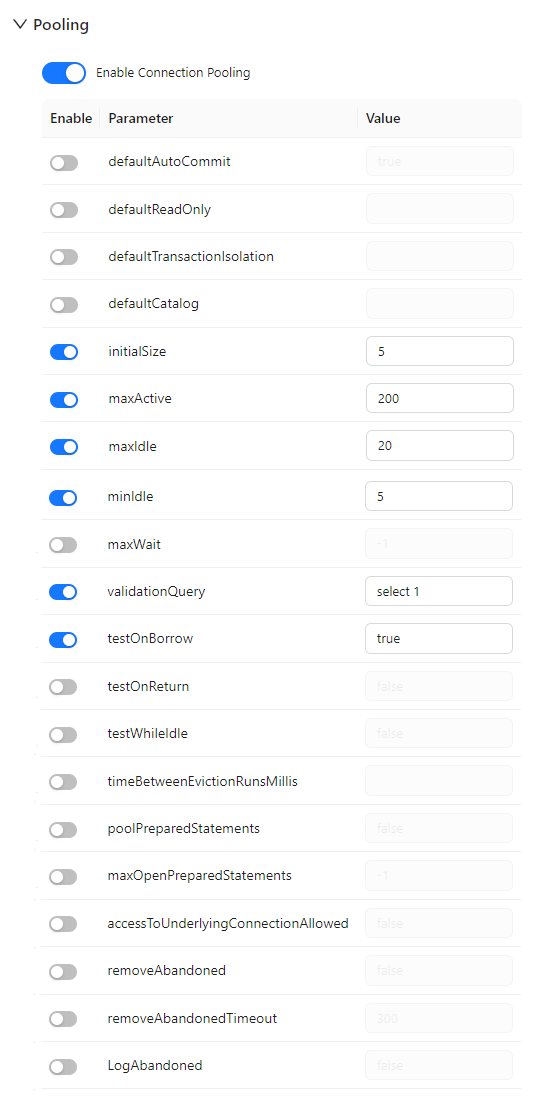
Enabling Connection Pooling improves database access performance and ensures stable operation in high-concurrency environments. Configuration parameters include:
Core Parameters
- initialSize: Initial connection count, default
5. - maxActive: Maximum connections, default
200. - maxIdle: Maximum idle connections, default
20. - minIdle: Minimum idle connections, default
5. - maxWait: Maximum wait time for obtaining a connection (milliseconds), default
-1(unlimited).
Validation Mechanism
- validationQuery: SQL statement to check connection validity, default
select 1. - testOnBorrow: Validate connection when borrowed from the pool, default
true(enabled).
Other Settings (Optional)
- testOnReturn: Validate connection upon return.
- testWhileIdle: Validate connection during idle time.
- removeAbandoned and logAbandoned: Whether to clean up long-unused connections and log them.
- poolPreparedStatements, maxOpenPreparedStatements: Whether to pool PreparedStatement objects.
Proper configuration of connection pooling enhances system performance and reduces database load.
6. Save and Test Connection
- After filling in all configurations, click Save.
- Use the Test Connection feature to verify successful connectivity.
- If the connection fails, check the following:
- Server address and port number are correct.
- Username and password are entered correctly.
- The database server allows remote access.
- Advanced parameters (e.g., SSL, time zone) match the actual database settings.
- The correct driver version is loaded (refer to the [JDBC Driver Management] documentation).